Arcade Car Physics!
- Aug 28, 2025
- 2 min read
Updated: Sep 9, 2025
Resources:
https://www.youtube.com/watch?v=LG1CtlFRmpU&list=LL&index=6
Space Dust Racing Arcade Vehicle Physics Tour
https://vehiclephysics.com/advanced/how-suspensions-work/
How suspensions work
Godot Engine
Car physics are fun, and surprisingly easy! The time I spent writing code is a fraction of the time I spent tweaking the values for each of the cars attributes, e.g speed, suspension damping etc, and I'm still not happy!
Godot 4.x supports a Vehiclebody3D which simulates more realistic car physics using wheels and more specialised physics options which would be helpful for cars you want to behave more realistically. I wanted to see how arcade car physics differ on their use, and it looks like they do, massively!
Have a look at Asseto Corsa, which uses very complicated physics that are comparable to reality, which is valuable to players who are looking for a racing game that most simulates motor sport seen on TV. But what if I want banana peels, or crazy big ramps that would definitely scrape the bottom of the car and destroy it once it lands?
This is where it becomes favourable to simplify the physics you use, so that they are more predictable against bizarre obstacles you may want to implement.
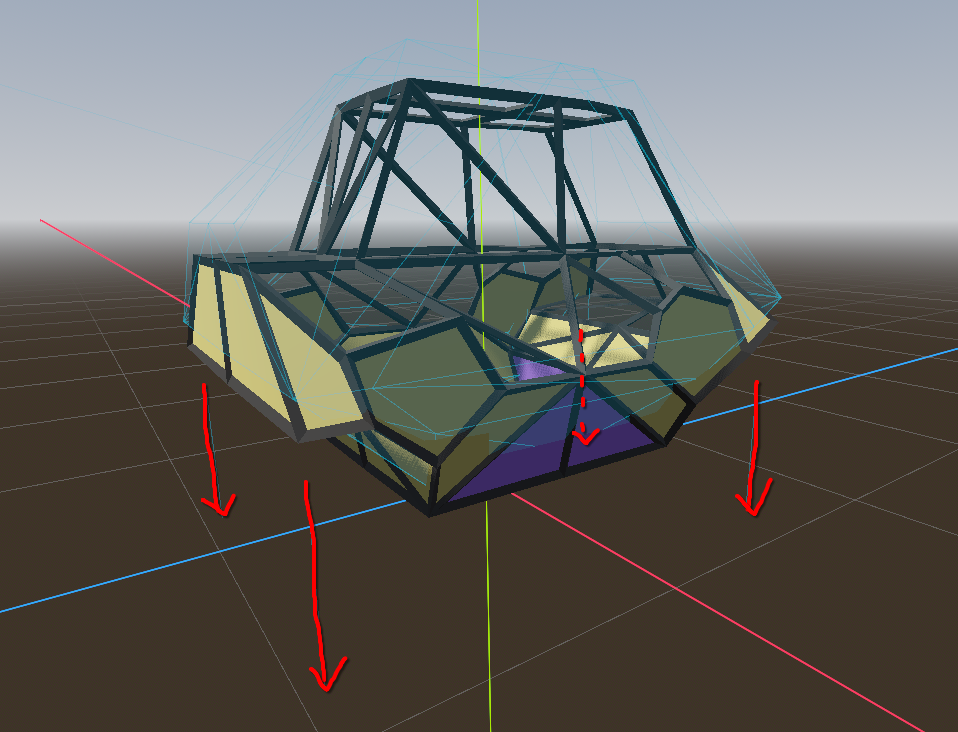
A favourable method for arcade-style racers is to give each corner of your vehicle a raycast that returns a collision point to the floor, and use that information to determine how much force should be applied at these points, depending on their distance to the ground, using Hooke's Law.
This video best describes what is being achieved here, as well as simulating traction. Some more very helpful diagrams are available in this video, and all theories are explained with no particular game engine in mind.
My interpretation inside of Godot uses a RigidBody3D node, and instead of using a Raycast3D, Godot has a SpringArm3D which is a Raycast3D that has functions we need like GetHitLength() which returns a float we can use towards our spring equation.
After following this method, the parameters I ended up changing the most were Mass, SuspensionStrength, SuspensionDamping, Torque and Speeds.
The first version I showed at the top has the vehicle showing a lower mass, but I increased the mass of the vehicle to 140KG (much lighter than a real vehicle), and multiplied each above parameter by the amount the mass was multiplied. This provided wildly different results, and reduced the bouncy effect seen in the original video.
I found that, unlike systems I am typically used to which require the most attention to changing code, I spent the most time changing the values that effect the physics of the vehicle in order to find the best feeling for my use case.

Comments